Thursday, April 21, 2011

Lots of different stuff! (:

Well I haven't blogged in awhile! I think since February...so anyways haha I think I have kind of lost " the touch" in writing and stuff. Butttt anyways (again) I just re-did my room, and its really cool because all of the kids in the room each have their own side ( that is Oliver, Mary Margaret, and Me). Oliver's side is pretty awesome because he has the head of his bed in the closet and their are curtains on both sides of him,... well I will just have to take a picture and post it, because it is kind of hard to explain. Mary Margaret's bed is right next to her window, she likes to look out in the morning and see whats happening. Now, my side is different from the others because I have to have it organized, clean ( as in not just straightened up but CLEAN) , and colorful as in tons of pink, orange, and green haha. So that's pretty much all, and I will take a picture of the other kid's sides when they are straightened up..(:


Shoes.


random, but it shows some of the organization.


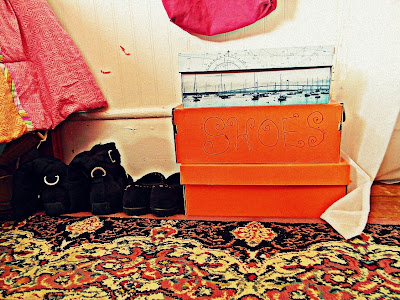
Yep! here it is, My side haha(: as you can see I like pink and orange a lot :P


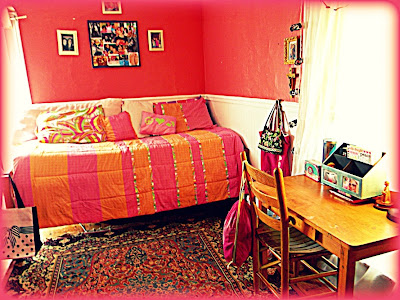
See the little white letters? That says Learn how to make this. Referring to the picture board on in the first picture. Just scroll down to learn how to make it.


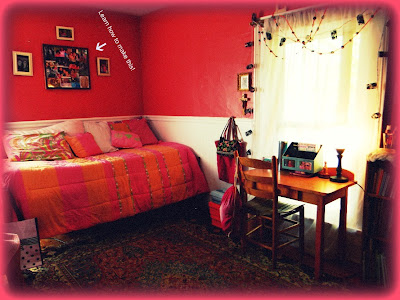
How to make the picture board:


You will need:


1.Scissors


2.Glue or tape
3. A piece of cardboard, cork board, or I even used an old dry erase board :P


4. Popsicle sticks, or just some thin pieces of wood.


5. Either some black paint, or black construction paper


6. Lots of pictures of you, friends or really anything.


7. Modge-Podge


8. Paint Brush


First: Take your piece of card board ( or whatever you decided to use) and arrange the pictures on it. Than either glue them or tape them to the cardboard. Next take your paint brush and modge-podge and paint a thin layer of modge-podge all over the top of your creation. Next line the Popsicle sticks ( or whatever haha ) and glue them around the whole board, like a picture frame. Then cut your construction paper into straight lines so they can cover the Popsicle sticks ( as shown in the picture way above) Or if you are using paint you will paint the Popsicle sticks black. You may want to use a measuring stick to measure your construction paper.


Well than you are pretty much done! Just let it dry for about 2-3 hours, put it somewhere as a deco and you have an awesome picture board! :)


Thursday, January 20, 2011

Valentine's Day Heart Strings

Looking for some great decorations for Valentines Day? This is a great way to spruce up your kitchen window sill, or bedroom, really anywhere!
You will need:
1. Paper with designs on it,
2. glue
3. scissors
4. stickers ( optional)
5. glitter ( optional)
6. ribbon


How to make it:
First cut out 6 hearts, all different designs, but the same size, ( you can cut more if you want your string of hearts to be longer. 6 hearts makes 3 hearts for the string)
Then cut your ribbon so it is about 1 1/2 feet long ( longer if you want more hearts.)
Then take one of your hearts and put it on the table decorative side facing down. Then place the string on top of it in the middle. Then put glue on another one of your hearts and place it decorative side up onto the heart and ribbon that are on the table ( you can look at the picture to give you the idea.) you can make as many hearts as you want and the string as long as you want. You can also add the stickers and glitter to your heart. Hope You Enjoyed!:)

Monday, January 17, 2011

Frame Your Freinds

You will need:

1. one medium size piece of cardboard or thick paper

2. 2 large sheets of decorative paper with cute designs on them
3. glue

4. scissors

5. a ruler
6. a pencil

7. some stickers or glitter ( optional)

How to make it:
first measure your cardboard and pretty paper and cut them so they are the same length ( big enough to fit a smaller piece of paper and a picture inside that little piece of paper) Than glue your pretty paper onto the cardboard so that you can't see the cardboard. Then glue your little peice of paper onto the pretty paper ( as shown in the picture below) Then you can glue your actual picture onto the little paper. You can then put stickers on the frame or glitter or nothing,..then you are done!

Hope you enjoyed it!